One of the most important objectives of creating a website is to broaden the user base of an organization and expand its operations. A very effective way to do this is to attach a contact form to the interface which will help in providing an easy option to add new subscribers while increasing the efficiency of the website.
WordPress is one of the most user- friendly platforms for web development and attracts a lot of owners of interfaces belonging to other platforms who use services like convert HTML to WordPress to migrate to the CMS. A simple method consisting of a few easy steps for adding a contact form in WordPress without using code is being provided for the benefit of website owners.
1. Selection of an Appropriate Plugin
Using a plugin for adding this new functionality to an interface, will be the most convenient method for any owner and therefore the first step is to select an appropriate contact form plugin. Identify the requirements of your website and the nature of information that you think is necessary that any visitor must provide. This will help in choosing the most suitable plugin which already contains most of the required fields, minimizing the need for customization. In order to explain the process, we will be using the WPForms Lite plugin which is a free product.
2. Installation of The Chosen Plugin in WordPress
Anyone who has used WordPress must be aware about the admin dashboard which can be used for conducting modifications to the website.

Go to the “Plugins> Add new” section and in the search field type the name of your chosen plugin like we have typed “WPForms” in the field in the below image.
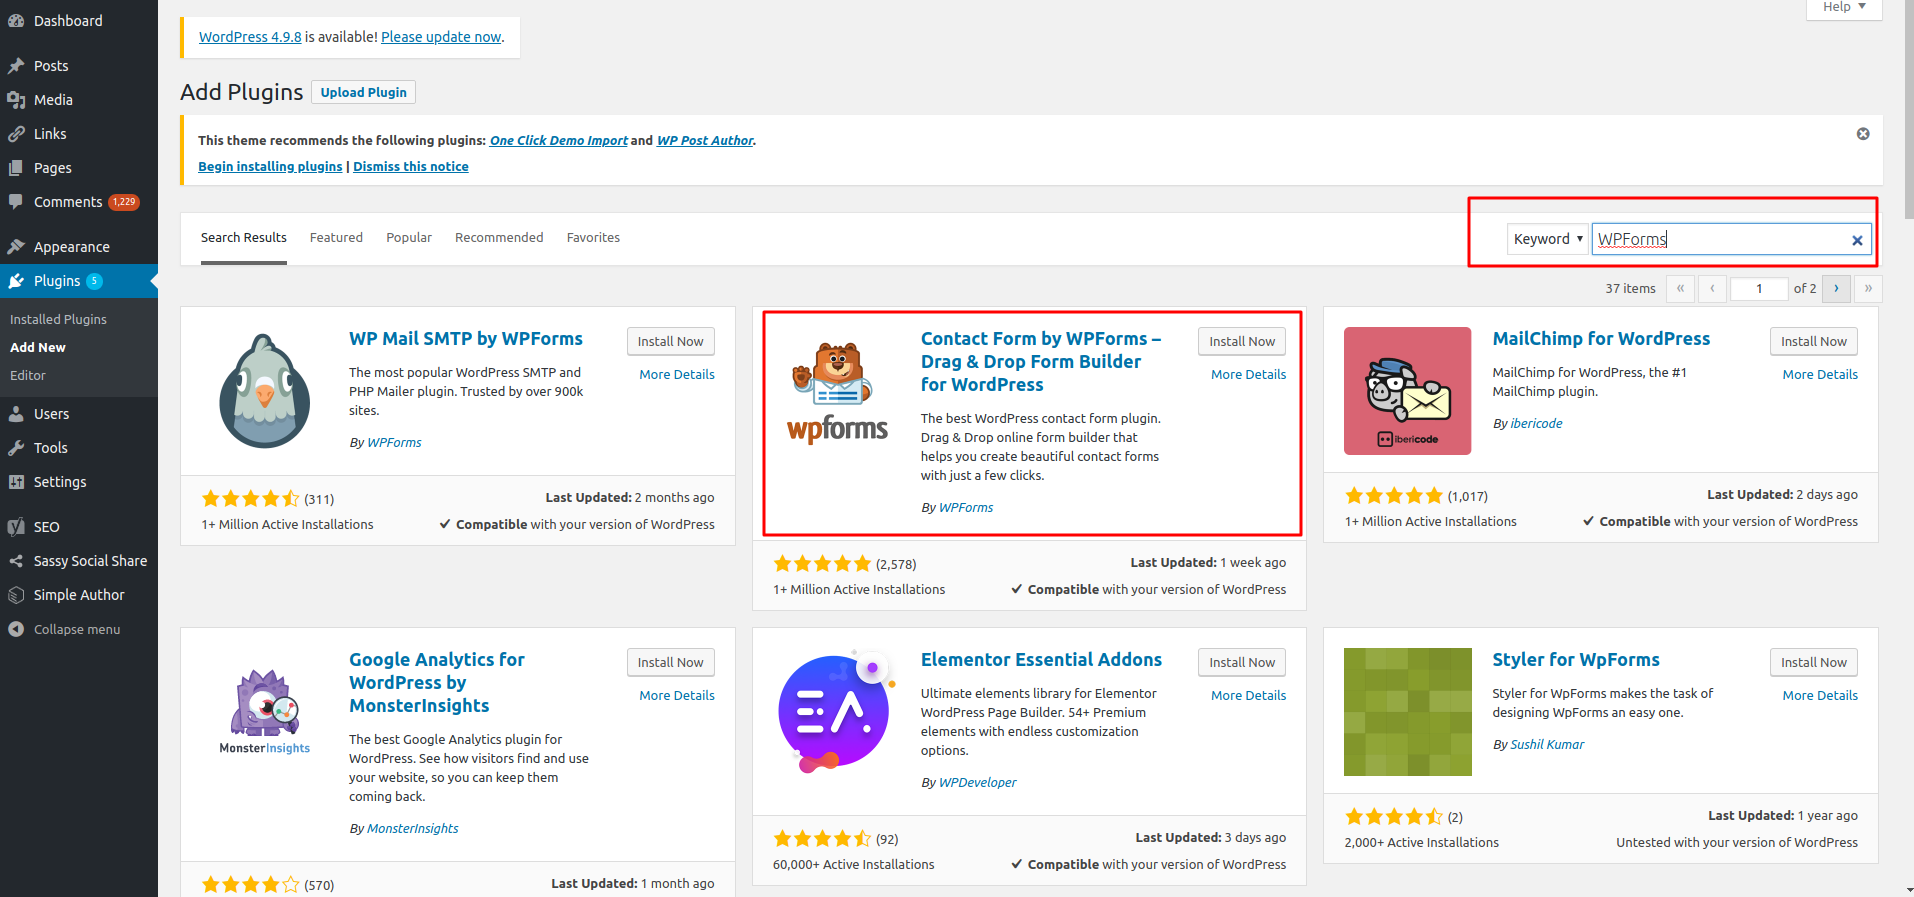
Click on the “Install Now” tab to install its setup and then activate it. This is a very easy process and even those people who are new to the CMS will do not take much time in getting used to the features of operating its admin dashboard.
3. Creation of The Desired Contact Form
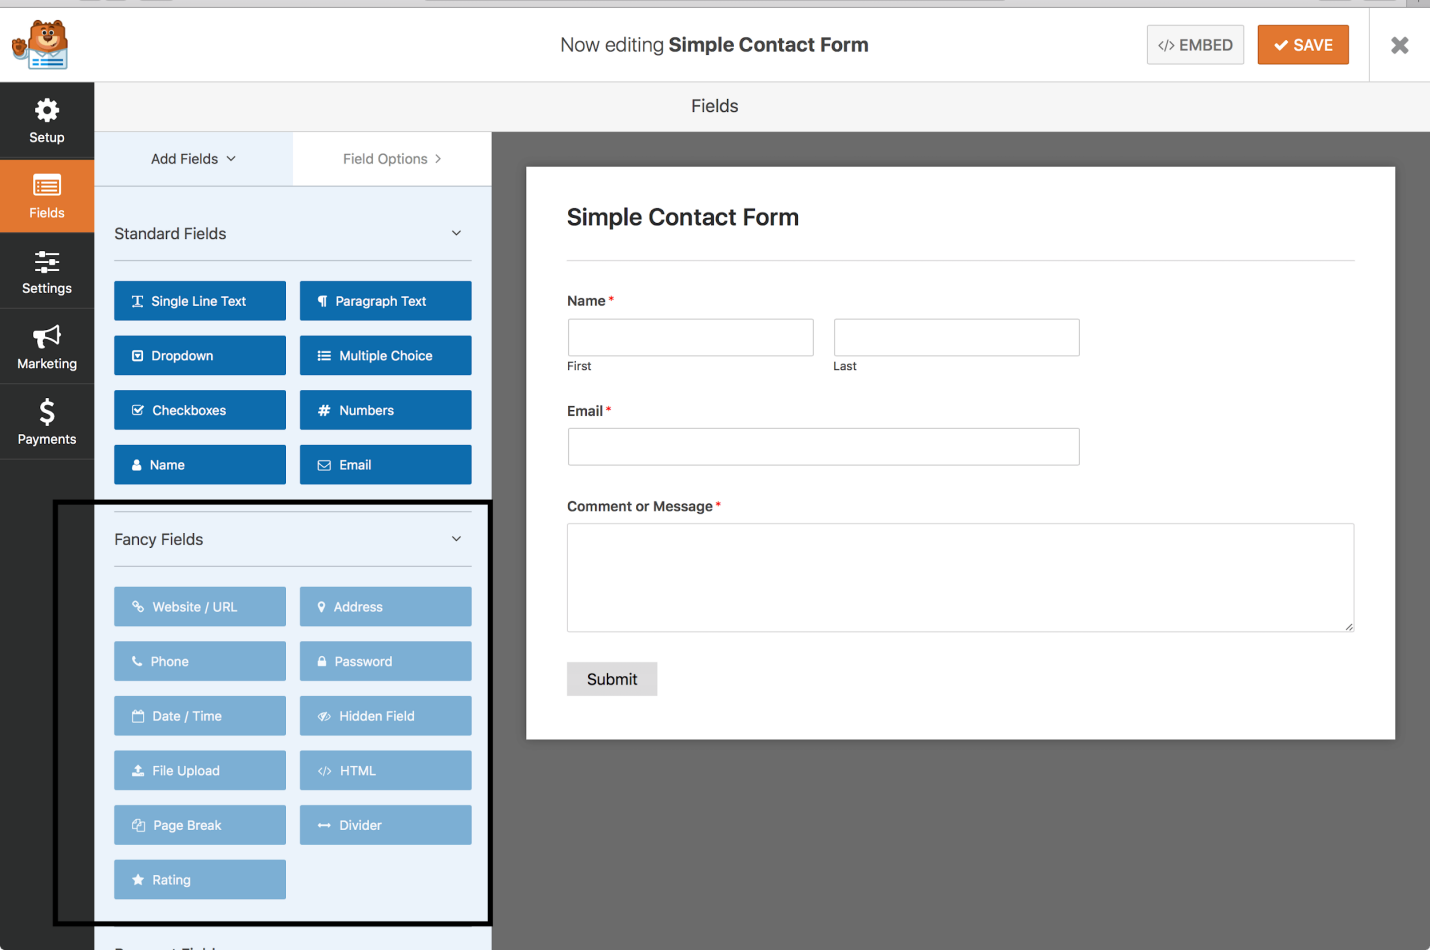
In the third entry of our list of easy steps for adding a contact form in WordPress website, we will finally create the contact form using the installed plugin. Access the dashboard and go to WPForms in the left hand menu and click on the “Add New” tab. The drag and drop form builder of the plugin will now be visible to the user who can give a name to the form and also choose a template for it. The WPForms plugin has two preloaded options for the form templates- Blank and Simple Contact Form. A basic form can be created using either of the two options.
In this example, we will be demonstrating the creation of the utility with the help of the Simple Contact Form template and add the name, email and comment fields. Take a look at the image below and you will see some additional options in the area enclosed in the rectangle on the left hand bottom corner. The plugin offers the drag and drop facility and you can simply drag the desired item and drop it onto your form. Once all the necessary fields have been chosen and added, click on the “Save” tab to store your selections.
4. Configuration of Form Notifications and Confirmations
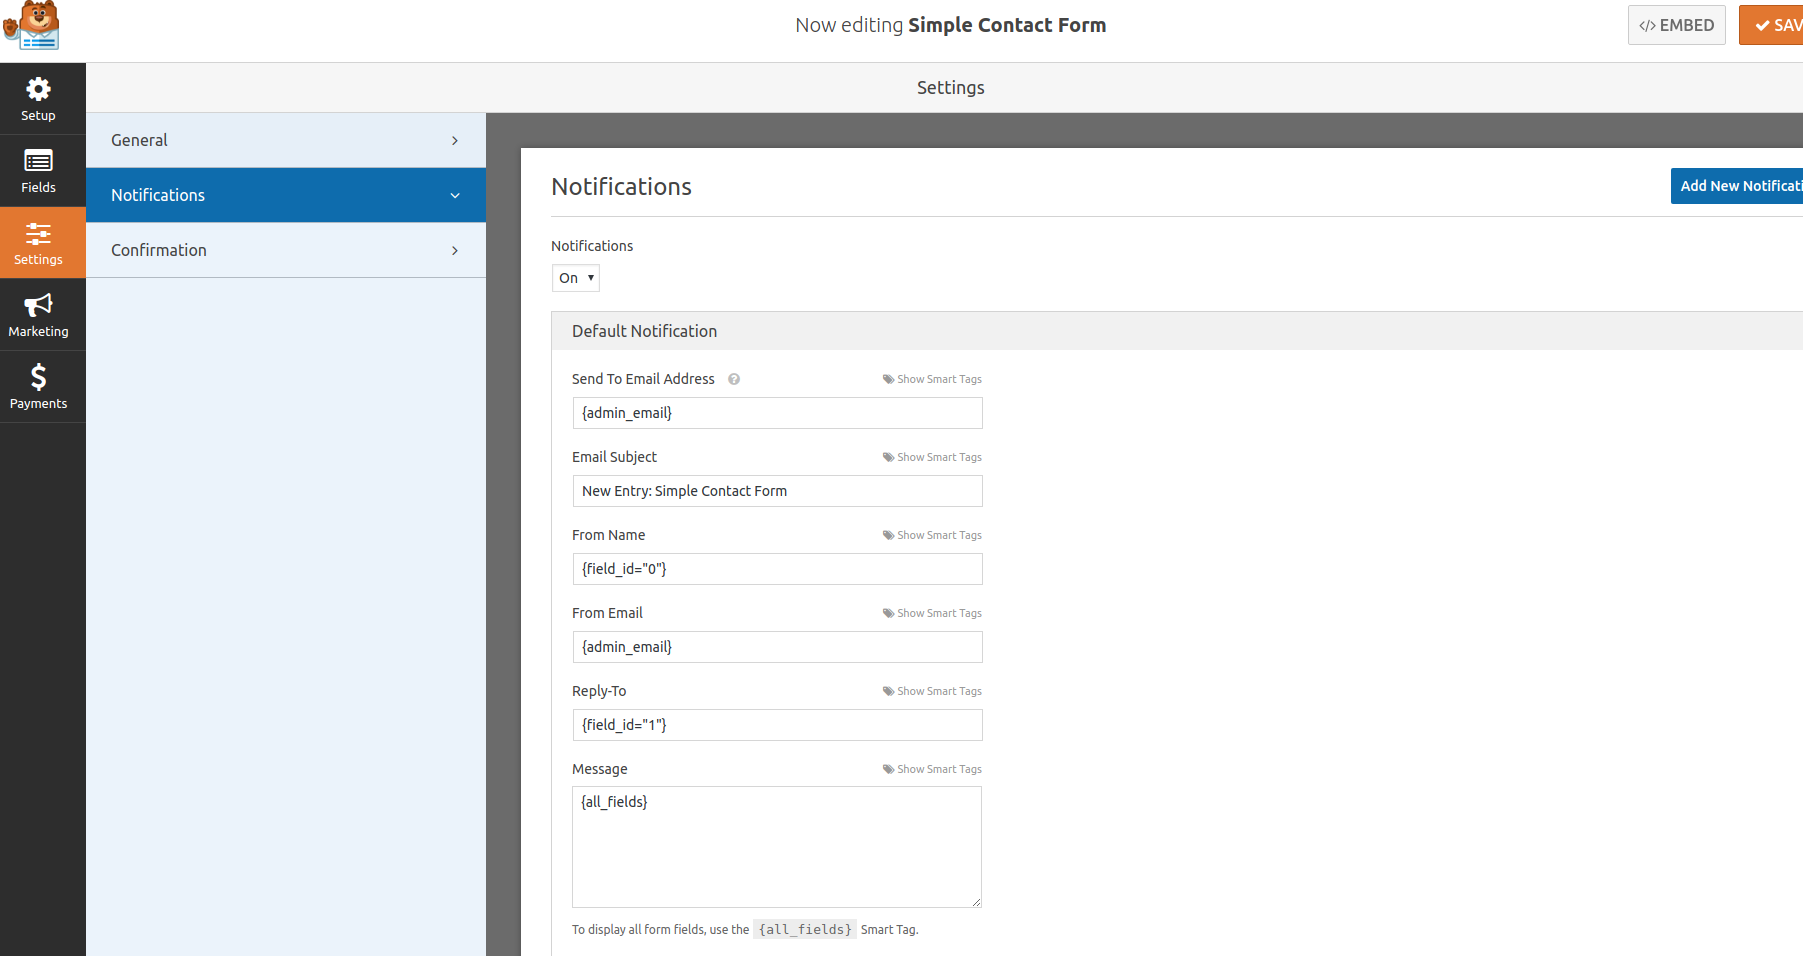
The purpose of a form is to add new subscribers and in order to inform the user that he/ she has successfully filled the form and registered with your website, a confirmatory message needs to be sent to him/ her. Similarly, you must be notified of any successful form submission on the interface. In order to complete both the tasks, the form notification as well as form confirmation need to be configured properly.
Access the “Settings” tab of the plugin and you will see options for “Notification” and “Confirmation” which have further options for personalizing according to the wishes of the website owner. The form confirmation is the message that a guest sees on completing the process of filling the form and generally a simple thank you message is set up for informing them of successful completion of the process but if you wish, the settings can be modified to redirect them to a custom page.

Take a look at the image below and you will find that the default settings in the Notifications area are adequate for any contact form. The notification is usually an email to the owner and the default settings if not changed, save the admin email of the website for the purpose. If you want, the email ID can be changed by adding the new one in the requisite field and even multiple accounts can be entered separated by a comma to enable sending of the notification mails to each one of them.
5. Addition of The Contact Form to A Webpage
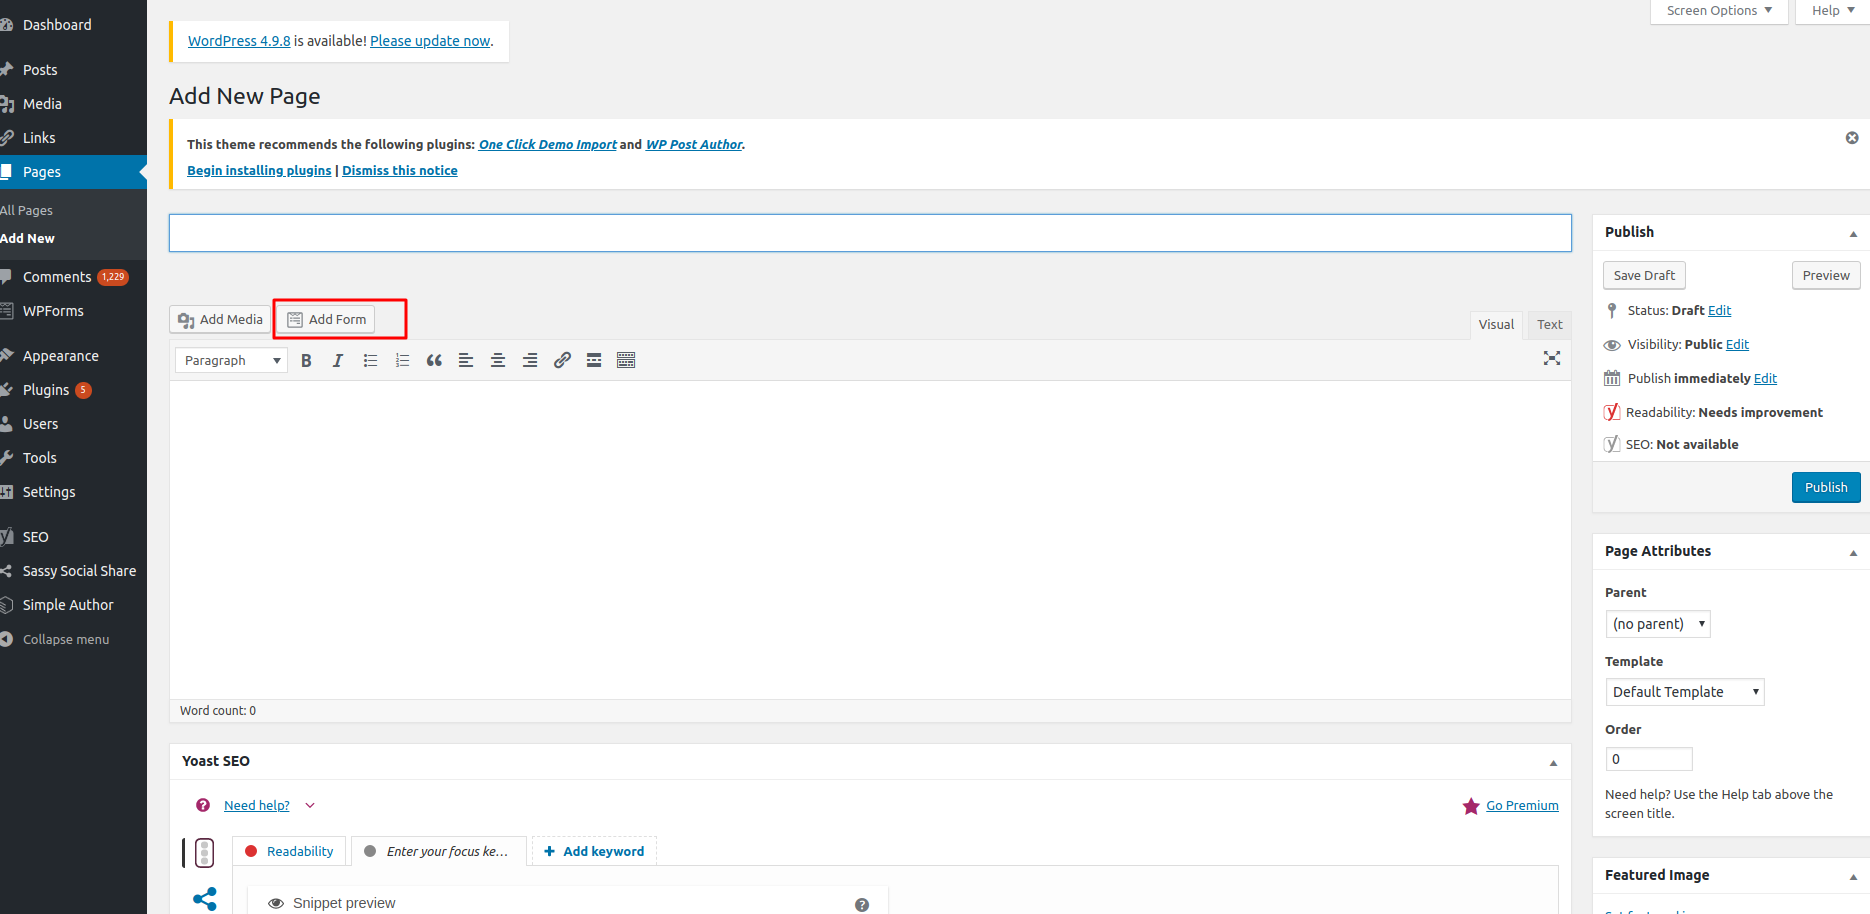
Once all the settings have been configured, the only task left is to add the form to a page of the website. A new page can be created for the purpose or an existing one be modified for attaching the form to it. Go to the “Pages” option in the admin dashboard and click on the “Add Form” tab followed by selecting the form you created. The shortcode of the contact form will be added to the page content. Save all the changes to complete the process.
If you wish to add the form to your sidebar, go to “Appearance> Widgets” and simply drag the WPForms widget to an area specified for the addition of widgets in the sidebar.

Conclusion
This process consisting of 5 simple and easy steps for adding a contact form in WordPress website will help any owner, irrespective of his/ her technical proficiency in creating a utility on their interface which will help in augmenting the user base.